In the world of modern kitchen appliances, a dishwasher is a true lifesaver, making the daunting task of hand-washing dishes a thing of the past. However, like any other machine, dishwashers can experience issues, and one common culprit is a malfunctioning control board. If you’re wondering how to tell if your GE dishwasher’s control board is bad, you’re in the right place. In this guide, we’ll walk you through the signs and steps to help you diagnose and address this common problem. By the end of this article, you’ll have the knowledge you need to keep your dishwasher running smoothly and your dishes sparkling clean.
How to tell if GE dishwasher control board is bad
Replacing a bad control board in your GE dishwasher might sound like a daunting task, but fear not; I’m here to guide you through the process step by step. With a little patience and some basic tools, you can have your dishwasher back up and running in no time:
Safety First
Before you start any repair, it’s essential to ensure your safety. Unplug the dishwasher from the power source, and if possible, turn off the circuit breaker. This precaution will help prevent any electrical accidents during the replacement.
Gather Your Tools
You’ll need a few tools for this task. Make sure you have a screwdriver (usually a Phillips head or Torx), a socket wrench, pliers, and a nut driver. Having a multimeter can also be handy for testing connections.
Access the Control Board

Most control boards are located inside the dishwasher door, behind the control panel. To access it, you’ll typically need to remove the screws holding the control panel in place. This may vary depending on your dishwasher model, so consult your dishwasher’s manual for specific instructions.
Disconnect Wires
With the control board exposed, carefully disconnect the wires attached to it. Take note of where each wire connects; you might want to take pictures to make reassembly easier.
Remove the Old Control Board
Once the wires are disconnected, you can remove the old control board. It’s usually secured with screws or mounting brackets. Carefully take it out, being mindful not to damage any surrounding components.
Install the New Control Board
Now, it’s time to install the replacement control board. Position it where the old one was and secure it with screws or brackets. Reconnect the wires to their respective terminals, using the reference pictures you took earlier.
Before putting everything back together, plug the dishwasher back in or turn on the circuit breaker. Test the dishwasher to ensure its functioning correctly. Make sure all the buttons and cycles work as they should.
Reassemble the Control Panel
If everything checks out, reassemble the control panel by reattaching it to the door and securing it with screws. Double-check that all the buttons and displays are properly aligned.
Finish Up
Finally, double-check all connections and wires to ensure they are properly secured. Put the dishwasher door back together, and you’re done.
Replacing a control board might seem intimidating at first, but following these steps will help you do it safely and efficiently. Remember, if you ever feel unsure or uncomfortable, it’s always a good idea to consult a professional for help. But with a bit of DIY spirit and a few tools, you’ll be able to give your dishwasher the repair it needs.
Signs of a Bad GE Dishwasher Control Board
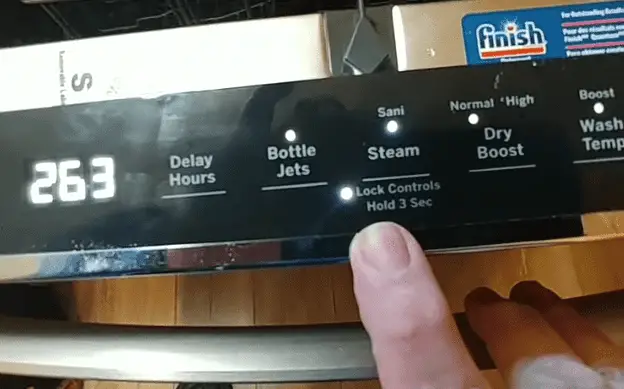
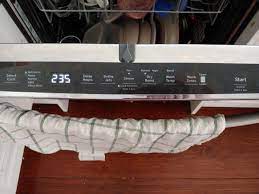
Observe the Indicator Lights
One common sign of a malfunctioning control board is the indicator lights not working as they should. These lights usually indicate the selected cycle or the dishwasher’s progress. If they stay dim, flicker, or don’t light up at all, it’s a red flag
Test the Control Panel
Try pressing the buttons on the control panel. If the dishwasher doesn’t respond or becomes unresponsive during a cycle, there’s a high chance that the control board is the culprit. The buttons should react promptly and take you through the cycle options smoothly.
Monitor the Cycle Performance
A misbehaving control board can lead to inconsistent cycle performance. If your dishwasher starts skipping steps in a cycle, like not filling with water or not going through the rinse phase, it’s a sign of trouble.
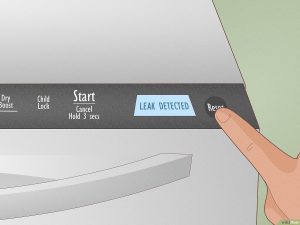
Watch Out for Error Codes
Modern dishwashers are equipped with error codes that display on the control panel. These codes can provide valuable clues. If you see unusual codes or a constant error message, it’s time to investigate further.
Check for Cycle Selection Response
Lastly, if your dishwasher doesn’t respond when you try to select a specific cycle, it’s a strong indicator of control board trouble. You should be able to choose your desired cycle without any hiccups.
These signs may vary from one dishwasher model to another, but understanding these common indicators will help you to diagnose a bad control board more easily. Remember, your dishwasher is a hardworking kitchen companion, and with a little care, it can be back to its efficient self in no time.
Tools and Preparations how to tell if Ge dishwasher control board is bad
Before we dive into the process of diagnosing and potentially fixing your dishwasher’s control board, it’s essential to gather the right tools and take a few safety precautions. Let’s walk through this step together:
Safety First
Safety should always be your top priority when working with any electrical appliance. Begin by ensuring that your dishwasher is completely disconnected from the power source. Unplug it, and if possible, turn off the circuit breaker that supplies power to the dishwasher. This precautionary measure will keep you safe while you work.
Gather Your Tools
To tackle this task effectively, you’ll need a few essential tools. Here’s what you’ll need:
- A screwdriver (typically a Phillips head or Torx) to remove screws and panels.
- A socket wrench for certain models with specific fasteners.
- Pliers for securely grasping and manipulating wires.
- A nut driver for some dishwasher panels.
- A multimeter, if you have one, for testing electrical connections.
Protect Yourself
While it may not involve wearing a hazmat suit, taking some basic precautions to protect yourself is still crucial. Avoid wearing loose clothing and jewelry that could get caught in the dishwasher’s moving parts. It’s also a good idea to wear gloves to protect your hands, especially if you’ll be handling sharp metal edges.
Stay Informed
Before you start working on your dishwasher, take some time to review the user manual or manufacturer’s instructions. Different dishwasher models may have varying internal structures and disassembly procedures.
Knowing what to expect can save you a lot of time and effort.
By taking these safety precautions and having the right tools at your disposal, you’ll be well-prepared to proceed with diagnosing and potentially repairing your dishwasher’s control board. It’s a small investment of time upfront that can lead to a smoother and safer repair process.
Preventive Maintenance
Preventive maintenance is the unsung hero of keeping your dishwasher running smoothly. It might not be as exciting as a major repair, but it can save you time, money, and the headache of a malfunctioning appliance. Let’s dive into some practical steps for taking care of your dishwasher:
Regular Cleaning
One of the simplest and most effective ways to prevent issues is by keeping your dishwasher clean. Over time, food particles, grease, and soap scum can accumulate, causing clogs and funky odors. Remove the bottom rack and inspect the drain area. Clean out any debris you find, and use a dishwasher cleaner or a mixture of vinegar and baking soda for a thorough cleaning.
Inspect Spray Arms
Your dishwasher’s spray arms are responsible for distributing water throughout the dishwasher to clean your dishes effectively. Regularly inspect them for clogs and blockages. If you notice any obstructions, remove them, and ensure the spray arms can rotate freely.
In conclusion
In conclusion, understanding how to tell if your GE dishwasher control board is bad is a valuable skill that can save you time, money, and the frustration of a malfunctioning appliance. By paying attention to the signs, accessing the right tools, and following the steps we’ve outlined, you can diagnose the issue and take appropriate action to get your dishwasher back in working order.