Alright, picture this: your brand-new, shiny dishwasher just got delivered. You’re hyped. You’re already dreaming about the glorious day when you’ll never have to argue over who’s doing dishes again. But then… reality hits.
How the heck do you actually install this thing?
And more importantly, what do you even need to get started?
No worries—whether you’re a DIY legend or a total newbie just trying to avoid a kitchen flood, I’m here to walk you through it. Grab a coffee, roll up those sleeves, and let’s build your “dishwasher install survival kit.”
The Essentials You Absolutely, Definitely Need
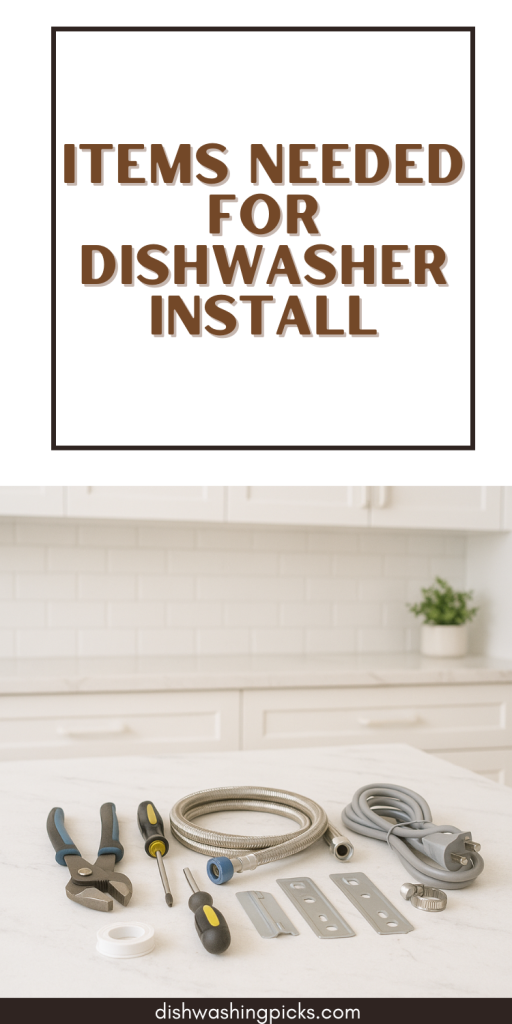
Imagine you’re packing a suitcase, but instead of beach clothes, you need plumbing bravery and a few tools. Here’s your must-have checklist:
- Dishwasher installation kit
(Most new dishwashers don’t include all the hookup parts—wild, right? Look for a kit with a 6-ft. stainless steel braided water supply line, power cord, and fittings.) - Adjustable wrench
Your new best friend for tightening (but not over-tightening) connections. - Screwdrivers
Both Phillips and flathead. Because life likes to keep you guessing. - Drill and bits
(Optional but super handy if you need to drill holes through cabinetry for hoses or wiring.) - Plumber’s tape (Teflon tape)
A tiny roll of magic that helps seal water connections. Without it? Hello, leaks. - Level
You don’t want your dishwasher slowly migrating across the kitchen or sloshing water out the sides. - Bucket and towels
Because even pros get surprise spills. It’s not if—it’s when.
Quick tip: If your dishwasher connects directly to hardwired power instead of plugging into an outlet, you might also need wire nuts and electrical tape. Fun, right?
Other “Good-to-Have” Items (Trust Me on These)
Okay, now for the stuff that’ll make your life 10x easier, even if they’re technically optional:
- Work gloves
Protect those hands from sharp edges underneath the dishwasher. (And they will be sharp—ask me how I know.) - Flashlight or headlamp
Under-the-sink spaces are basically black holes. You’ll want light, or you’ll be doing plumbing by Braille. - Appliance dolly or furniture sliders
If you’re moving the old unit out yourself, your back will thank you later.
Prepping Your Kitchen Before Installing the Dishwasher (a.k.a. Avoiding a Total Meltdown Later)
Alright, you’ve gathered all your gear like a true dishwasher warrior.
Now, before you go charging in, wrench in hand, take a beat.
Installing a dishwasher isn’t just about plugging stuff in—it’s about setting the stage for an easy, leak-free, frustration-minimized install. (Keyword: minimized. Let’s be real, something always tries to go sideways.)
So, what prep do you need to do?
1. Clear the Area (Yes, Even That Random Junk Drawer)
First things first—give yourself space.
Move any clutter, rugs, or random floor mats out of the way. You’ll be kneeling, scooting, and occasionally lying dramatically on the floor wondering why you ever started this project. Make it easy on yourself.
Bonus points: Clear out the under-sink cabinet too. You’ll need access to plumbing hookups—and trust me, you don’t want to be wrestling with old cleaning supplies at the same time.
2. Shut Off the Water and Power
You saw this one coming, right?
Before you disconnect the old dishwasher (or mess with anything wet or electrical), shut off:
- Water supply to the dishwasher (usually a small valve under the sink).
- Electricity to the dishwasher circuit at the breaker box.
Imagine this: You’re halfway through removing your old dishwasher when—BOOM—water sprays everywhere like you just won a game show.
Yeah… let’s skip that.
3. Check the Existing Connections
Now’s the perfect time to inspect a few key things:
- Water line: Is it old or corroded? (Replace it. Trust me.)
- Drain hose: Still flexible and clean? (If it’s gunky or stiff, toss it.)
- Electrical wiring: Safe and intact? (No exposed wires, please.)
This little inspection could save you from emergency plumber fees later. Future You will want to high-five Current You for this.
4. Measure Twice, Move Once
Before you yank out the old machine or shove the new one in, double-check your measurements:
- Width, height, depth of the opening
- Clearance from cabinets and flooring
- Door swing room (especially if your kitchen’s on the smaller side)
Pro tip: Modern dishwashers are often a smidge taller than older models, and flooring changes (like new tile) can mess with the fit. Better to find out now than after you’ve muscled it halfway into place.
How to Install Your Dishwasher (Without Losing Your Mind)
Alright, you’re prepped, you’re pumped, and you’ve probably had at least one cup of coffee.
Let’s dive into the good stuff: actually installing that beautiful dishwasher.
Deep breath—you’ve got this.
1. Slide the New Dishwasher (Almost) Into Place
Carefully, gently, lovingly (okay, maybe not lovingly) slide your new dishwasher into the opening.
But hold up— don’t shove it all the way in yet!
You still need access to the hoses and wires in the back, so leave it sticking out a bit like a turtle half in its shell.
2. Connect the Water Line
Now it’s plumbing time. Here’s the game plan:
- Find the inlet valve (usually at the bottom front of the dishwasher).
- Attach the water supply line to the valve.
- Tighten it snugly, but don’t Hulk-smash it—you don’t want to strip the threads.
Imagine this: You’re a secret agent on a mission to stop leaks before they start. Precision matters.
If you have plumber’s tape handy, wrap a little around the threads before attaching the line. It’s like a security blanket for your connection.
3. Hook Up the Drain Hose
Next up: where the dirty water goes.
- Attach one end of the drain hose to the dishwasher (there’s usually a designated spout).
- Run the other end either to the garbage disposal (if you have one) or directly to the sink drain.
Important: Create a high loop with the hose under the sink.
(You can literally zip-tie it up high.)
This little move stops gross sink backflow from ending up in your shiny clean dishwasher. Ew.
4. Wire It Up
Electricity time—but safely!
If your dishwasher has a plug, you’re golden: plug it into the dedicated outlet.
If it’s hardwired (aka connected directly with wires), here’s your checklist:
- Match the wires—black to black (hot), white to white (neutral), green or bare to ground.
- Use wire nuts and secure everything nice and tight.
- Gently tuck the wires into the junction box.
Pro tip: Take your time here. Sloppy wiring = headaches later.
5. Final Slide and Level Check
Alright, now you can finish sliding the dishwasher all the way in!
But wait—don’t just shove it and call it good.
Use a level (or your phone with a leveling app) to make sure the dishwasher isn’t tilted sideways or backward.
Adjust the leveling legs underneath if needed.
Level = no weird leaks or doors swinging open by themselves like you’re in a horror movie.
6. Secure the Dishwasher
Almost done!
Open the dishwasher door, and inside along the top, you’ll usually find mounting brackets.
- Screw those brackets into the underside of your countertop (or side brackets into the cabinet sides, depending on the model).
- This keeps your dishwasher from tipping forward when you load heavy pots.
Because no one wants to be pancaked by a rogue dishwasher, right?
That’s It—You Installed a Dishwasher!
Turn the water and power back on, run a quick test cycle, and listen for the sweet, sweet sound of no leaks and smooth operation.
If you hear weird noises? Double-check your connections.
If you see leaks? Tighter fittings or plumber’s tape might be your new best friend.
How to Keep Your Dishwasher Running Like a Dream
Congrats again—you’re officially a dishwasher installation boss. 🏆
But now comes the part nobody talks about enough: actually taking care of it so it doesn’t turn into a smelly, cranky mess six months from now.
Sounds boring? Maybe.
But stick with me—it’s easier (and way more satisfying) than you think.
1. Don’t Skip the Rinse (Sometimes)
Okay, real talk:
Modern dishwashers are built to handle a little grime. They’re like mini superheroes for your dishes.
But if your plate looks like it just came out of a pie-eating contest?
Give it a quick scrape or rinse first.
Imagine this:
Would you want to swim through a pool full of leftover spaghetti sauce?
Exactly. Your dishwasher doesn’t either.
2. Load It Like a Pro
Yes, there’s a right way to load a dishwasher—and no, it’s not just “cram everything wherever it fits.”
- Plates? They love facing the center.
- Bowls? Angle them downward so water doesn’t pool.
- Big items? Keep them on the sides or back so you don’t block the sprayer arms.
Think of it like playing Tetris, but the prize is spotless dishes and a longer-lasting machine.
3. Clean the Filter (Yes, You Have To)
Underneath that bottom rack, there’s a little filter trap.
And if it’s full of gunk, your dishwasher basically has to wash dishes in dirty water. Gross, right?
About once a month:
- Twist it out (it usually just unscrews by hand).
- Rinse off any food bits and slime.
- Pop it back in.
Bonus: Your dishwasher will smell fresher, too. Thank me later.
4. Run It Hot and Often
Weird but true: running your dishwasher regularly actually keeps it healthier.
Hot water flushes out grime buildup, and frequent cycles keep the seals moist so they don’t dry out and crack.
If you only run it once a week?
Try this: Run a rinse cycle midweek just to keep things moving.
5. Give It a Deep Clean (Once in a While)
Think of it like a mini spa day for your dishwasher:
- Toss a cup of white vinegar into the bottom and run a hot cycle.
- Sprinkle some baking soda afterward and do a quick wash.
Boom. Sparkling interior, no weird smells, and no secret buildup lurking behind the scenes.
You’re Now Officially a Dishwasher Whisperer
Look at you—installing, maintaining, and totally crushing this whole dishwasher game. 🔥
And best of all? You’ve probably just added years to your appliance’s life (and saved yourself a bunch of headaches).