The Crumb Crisis
Be honest—when’s the last time you peeked between your car’s cup holder and seat? If you just made a face, don’t worry, you’re not alone. Coffee drips, chip crumbs, random lint—cars have this magical way of collecting gunk in every nook and cranny.
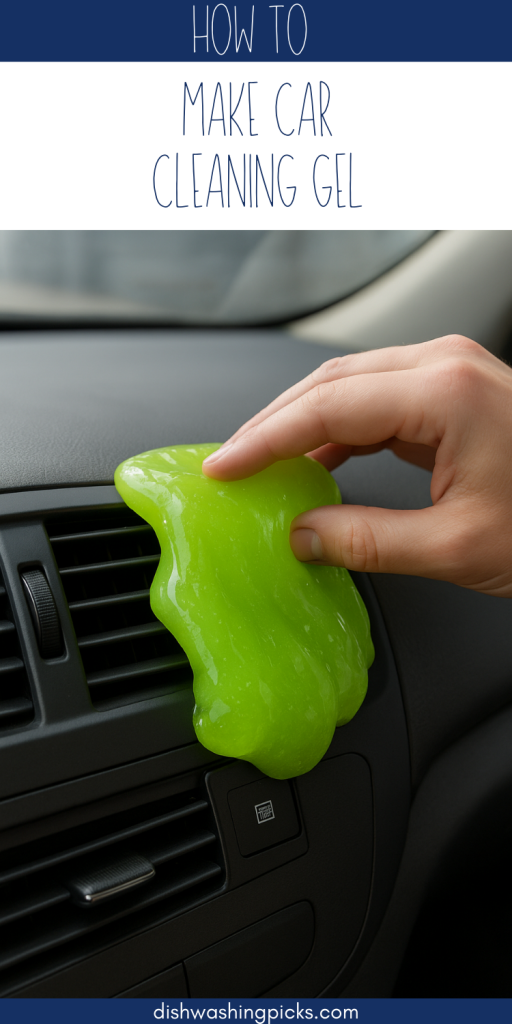
And here’s the kicker: even the vacuum cleaner sometimes waves a white flag when it comes to tight spaces. That’s where car cleaning gel comes in. It’s squishy, sticky (in a good way), and sneaks into all those tiny gaps to lift out the dirt. The best part? You can make it at home with just a few ingredients.
Why Bother Making It Yourself?
You could buy a tub of car cleaning gel online, sure. But here’s why DIY-ing it makes sense:
- Cheaper: Store-bought versions cost way more than a few pantry ingredients.
- Customizable: Want it neon green? Or lavender-scented? Totally up to you.
- Eco-friendly: Homemade gel skips unnecessary packaging and weird chemicals.
Plus, let’s be real—it’s kinda fun to play chemist for a day.
What You’ll Need: The Gel Arsenal
Ready? Here’s your shopping list (and you probably own most of this already):
- 1 cup warm water
- ½ cup white glue (yes, like the school glue you used as a kid)
- ½ teaspoon borax (or baking soda as a gentler alternative)
- Food coloring (optional, but who doesn’t like cool colors?)
- A few drops of essential oil (lemon, lavender, or mint = fresh car vibes)
Pro tip: If you want a completely non-toxic version, skip borax and use baking soda, though the texture will be a bit softer.
Step-by-Step: Making the Magic Gel
Here comes the fun part—mixing!
- Mix the borax solution: In a bowl, dissolve the ½ teaspoon borax in 1 cup of warm water. Stir until it’s fully dissolved.
- Prepare the glue mix: In another bowl, pour in the glue and add a few drops of food coloring and essential oil. Stir gently.
- Bring it together: Slowly add the borax solution to the glue mixture while stirring.
- Knead the gel: Once it starts clumping, pick it up and knead it with your hands until it feels squishy and stretchy.
Congrats—you just made your very own car cleaning gel!
How to Use It: Satisfying Clean-Up
Now for the part that makes this all worth it: the cleaning.
- Roll the gel into a ball.
- Press it gently onto dusty vents, crumb-filled cup holders, or the edges of your gear shift.
- Pull it away, and ta-da—dust and dirt come out stuck to the gel.
Imagine cleaning out your air vents in seconds without awkwardly jamming cotton swabs in there. Feels like winning, right?
Storing and Reusing Your Gel
Here’s the beauty of it—you don’t have to toss it after one use.
- Keep it in an airtight container or a sealed zip bag.
- Store it in a cool, dry place (avoid leaving it in your car on a hot day—it’ll melt into a sad puddle).
- Replace it once it looks too dirty or loses its stickiness.
Typically, one batch lasts a couple of weeks depending on how often you use it.
From Messy to Satisfying
Homemade car cleaning gel is more than just a cleaner—it’s a mini stress reliever. The squish, the stretch, the way it pulls up hidden dirt—it’s oddly therapeutic. And now that you know how simple it is to make, you’ll never look at those dusty vents or crumb-filled gaps the same way again.
So, the next time your car starts looking like a snack graveyard, skip the frustration. Make a batch of DIY gel, pop it in your glove box, and enjoy that “freshly detailed” feeling—without ever paying for a detail.