Have you ever looked at your vacuum cleaner and thought, “Man, I wish I could just whip up a new bag myself instead of hunting for the exact brand online”? Yeah, me too. Life’s busy, stores are sometimes a hassle, and honestly, a little DIY always feels rewarding. Today, we’re going to tackle the surprisingly simple—and kinda fun—task of making your very own vacuum cleaner bag at home. Don’t worry, it’s easier than assembling IKEA furniture… and no missing screws!
Why Even Bother?
Before we get into the nitty-gritty, let’s ask the obvious: why not just buy one?
Well, think about it. Sometimes the store is out, shipping takes forever, or you have a vacuum so vintage that finding its bag is like hunting for a unicorn. Plus, making your own can save money and give you that satisfying “I made this!” feeling. Imagine showing it off to a friend: “Yeah, I made a vacuum bag. No big deal.”
And let’s be honest—who doesn’t like a bit of homemade hackery now and then?
What You’ll Need
Okay, so now you’re thinking, “Cool, but do I need some high-tech materials here?” Not at all. Most of this you probably have lying around at home. Here’s a quick list:
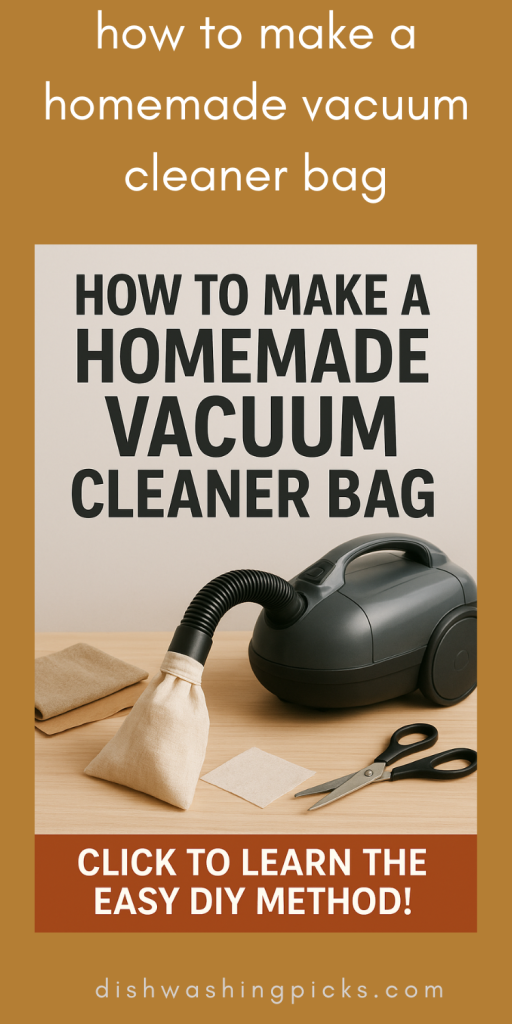
- Paper bags or sturdy fabric – think old grocery bags or thick cotton. Paper works surprisingly well if you fold it right.
- Scissors – not optional unless you like messy edges.
- Tape – duct tape or strong packing tape. Bonus points if it’s colorful.
- Rubber bands or string – for securing the bag in the vacuum.
- Optional: coffee filters – if you want an extra layer of dust-trapping magic.
See? Not rocket science. If you can fold, cut, and tape, you’re halfway there already.
Step 1: Pick Your Base Bag
Start with your material of choice. Paper is lightweight and disposable; fabric is reusable. If you’re going for fabric, pick something breathable but tight enough to trap dust. Think of it like a ninja—dust enters, but it doesn’t escape.
Cut it into a size that fits snugly in your vacuum’s bag compartment. A good trick: take the old bag and use it as a template. Trace it, cut it out, and boom—you’ve got the perfect size.
Step 2: Folding and Sealing Your Bag
Now that you’ve got your base bag cut to size, it’s time for the fun part: shaping it so it actually works. Think of it like folding a paper airplane, except this one sucks up dust instead of soaring through the air.
Folding Like a Pro
Here’s a little trick: fold the top of your bag about an inch or two inward. Why? Because this creates a reinforced opening that won’t tear when you attach it to your vacuum. You can fold the sides too if your bag is extra wide—just make sure the folds don’t block the opening.
Imagine this… your dust particles are lining up, thinking they’re going to escape, and—BAM!—they hit your DIY ninja bag. That’s right, you’re the hero here.
Tape It Up
Tape is your best friend at this stage. Secure the folds with tape so nothing slips while the vacuum is running. If you’re using fabric, a little extra tape or a stitched hem can prevent fraying. Just make sure the opening where air flows remains unobstructed—otherwise, your vacuum will be puffing instead of sucking.
Optional Extra Layer
Want to get fancy? Slide in a coffee filter or a piece of thin fabric inside your bag. It’s like adding an invisible force field for dust. This little layer catches fine particles that might otherwise escape, and your vacuum stays cleaner for longer. Bonus: no sneezing fits from dust clouds.
Step 3: Attaching the Bag
Okay, so you’ve got a nicely folded, taped-up bag. Now what? Time to make it stick.
- Rubber bands or string are perfect for securing your homemade bag around the vacuum inlet. Loop it snugly so it doesn’t wobble around.
- Make sure there’s a good seal. Air will always try to escape through the weakest spot, so a tight fit = happy vacuum.
Pro tip: if your bag slips during the first run, don’t panic. Adjust the folds, tighten the bands, and test again. It’s a little like Goldilocks—just right takes a few tries.
Step 4: Maximizing Efficiency & Troubleshooting
So, your DIY vacuum bag is in place. Awesome! But let’s be real—homemade doesn’t mean “set it and forget it.” Here’s how to get the best performance and avoid any mishaps.
Keep It Clean
Just like you wouldn’t wear the same socks for a week (hopefully), your bag needs a little TLC. Empty it regularly before it’s completely full. Why? Because a stuffed bag reduces suction, makes your vacuum work harder, and—let’s be honest—nobody wants that sad, wheezy vacuum sound.
Layer It Smartly
If you went the extra mile with a coffee filter or extra fabric layer, switch them out occasionally. Think of it like a dust superhero cape—it protects your vacuum from the evil forces of fine dust and allergens.
Watch for Air Leaks
Air leaks are the sneaky villains of vacuuming. If your bag isn’t sealed properly, your vacuum will lose suction. Simple fix: check the tape, tighten the rubber band, or add a little extra fold to the opening. Test it by turning on the vacuum and seeing if it feels as powerful as usual.
Quick Fixes
- Bag slips → tighten rubber bands or adjust folds.
- Tears → reinforce with tape or replace the bag.
- Reduced suction → make sure bag isn’t overloaded.
Think of this as your vacuum bag “training routine.” Keep it in tip-top shape, and it’ll perform like a store-bought one—maybe even better because, hey, you made it yourself.
Wrapping It Up
There you have it—a full guide to making a homemade vacuum cleaner bag that’s effective, cheap, and kinda fun. From picking your material, folding and sealing, to attaching and maintaining it, you’re now officially a DIY vacuum bag pro.
Imagine this: next time your vacuum starts wheezing, instead of panicking or paying for an overpriced replacement, you whip out your homemade bag, pop it in, and get back to cleaning like a champ. Feels good, right?