Why Cover Your Dishwasher Door?
So, here’s the deal: you’re standing in your kitchen, staring at your dishwasher door, and you can’t help but think, “This thing looks… kind of plain.” Maybe it’s the color, maybe it just doesn’t match the rest of your kitchen, or maybe you’re just ready to give your space a little refresh. Whatever the reason, you’re here, and you want to know how to cover that dishwasher door, right?
Well, lucky for you, I’ve got you covered! Whether you want to add a bit of personality to your kitchen or simply match the door to your cabinets, covering a dishwasher door is easier than you think. And no, you don’t have to hire a pro. You can totally tackle this yourself. So let’s dive into how you can give your dishwasher a fresh new look without too much hassle.
Step 1: Choose Your Material (What’s the Look You Want?)
Alright, before you start grabbing tools and paint, let’s talk about what kind of material you’re going to use to cover that door. There are plenty of options here, and it all depends on what vibe you’re going for. Do you want something sleek and modern, or maybe something a little more rustic?
Here are a few ideas:
- Vinyl or adhesive film – Perfect for a quick, smooth finish. Plus, it’s easy to apply, and you can even find textured films that mimic wood or stainless steel.
- Wood panels – If you’re feeling a bit crafty and want to match your kitchen cabinets, wood panels are a solid choice. They’ll add a custom, high-end look.
- Metal sheets – Want that stainless steel look without buying an entirely new dishwasher? Metal sheets are a great option to give your door a shiny, modern feel.
- Magnetic covers – This is a super easy, non-permanent option. Just slap on a magnetic cover, and boom—you’ve got a new look.
Think about the overall theme of your kitchen. Do you want the dishwasher to blend in, or stand out as a statement piece? That’ll help you choose the material that works best for you.
Step 2: Measure Your Door (Get the Right Fit)
Now that you’ve chosen your material, it’s time to measure your dishwasher door. The last thing you want is to buy something and realize it’s too small or too big for the door, right? Let’s avoid that awkward situation.
Use a tape measure to get the exact width and height of the door, including the edges. If you’re using something like a metal sheet or wood panel, make sure to add a little extra to account for trimming. A perfect fit is key to making everything look neat and professional.
Pro tip: Don’t forget to account for any handles or knobs. You don’t want your cover to get in the way of the door’s functionality.
Step 3: Apply Your Covering (Time to Make It Pretty)
Okay, here’s where the magic happens. Depending on your material choice, the method of applying the cover will vary, but the basics are pretty straightforward.
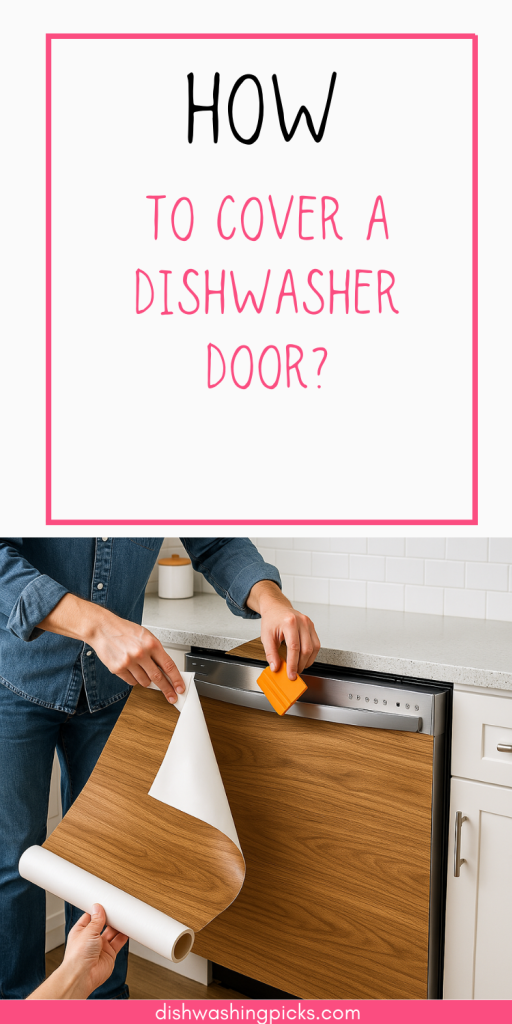
- For adhesive film: Peel off the backing and carefully stick the film onto the door, starting from one side and smoothing out any air bubbles as you go. It’s like putting a sticker on a big surface, but a lot less fun (unless you’re into that kind of thing).
- For wood panels: You’ll want to use a strong adhesive or screws to attach the wood to the door. If you’re using screws, make sure they don’t stick out or interfere with the door’s function.
- For metal sheets: You can use industrial-strength adhesive or screws. If you’re going with adhesive, apply it evenly to the back of the metal sheet, then carefully place it on the door.
- For magnetic covers: Simply place the cover on the door, and you’re done! Easy, right? This is one of the simplest ways to change up your look.
As you apply your covering, take your time to make sure everything is smooth and even. A little patience here goes a long way, especially if you’re working with something like adhesive film that needs to be free of wrinkles and bubbles.
Step 4: Trim and Tidy Up (The Final Touches)
Once your cover is on, you might notice some extra edges hanging off the door. No biggie! Grab a utility knife or scissors and trim the excess. This is especially important for materials like vinyl or adhesive film, where the edges should be sharp and clean.
After trimming, give the door one last check. Does it look neat and tidy? Does the covering sit flush against the door? If everything looks good, you’re pretty much done!
Step 5: Let It Settle and Enjoy Your New Look!
Once you’ve covered the door and cleaned up the edges, give everything a little time to settle. If you used adhesive, let it fully bond before you start using your dishwasher again. This ensures that the material stays in place and doesn’t shift.
Now, stand back and take a look at your handiwork. How awesome does that new dishwasher door look? You’ve just transformed your kitchen, and you didn’t even have to spend a ton of cash.
Your Dishwasher Door, Your Style
And there you have it! Whether you’ve gone for a sleek, modern look with vinyl or a custom feel with wood, you’ve just learned how to cover your dishwasher door and give your kitchen a fresh new look. The best part? You did it yourself, and now you’ve got a dishwasher door that matches your personal style.
So, are you ready to dive into this project? Trust me, it’s totally worth it. And hey, if you’re feeling inspired, you can even tackle other kitchen upgrades while you’re at it. Who knows what you’ll fix next!

