If you’ve ever wondered about the most efficient and convenient way to clean your gas stove grates, you’re in the right place. In this comprehensive walkthrough, we’ll explore the step-by-step process of cleaning gas stove grates using a household appliance you might not have considered: the dishwasher. Say goodbye to scrubbing and soaking, and get ready to discover a time-saving and effective method that will leave your grates gleaming. Let’s dive into the world of hassle-free gas stove grate cleaning with the power of your dishwasher.
Effortless Gas Stove Grate Cleaning in Dishwasher
Step 1: Pre-Cleaning Preparation
Before we dive into the dishwasher magic, ensure your safety. Turn off the gas and let the stove cool. It’s always a good idea to wear gloves to protect your hands.
Step 2: Remove the Grates
Gently lift the grates from your gas stove. If they’re particularly grimy, give them a quick shake outside to get rid of loose debris.
Step 3: Scrape Off Loose Residue
Grab a spatula or a blunt knife to scrape off any loose gunk clinging to your grates. This initial step makes the dishwasher’s job a whole lot easier.
Step 4: Soak the Grates
Fill your sink or a basin with warm, soapy water. Let the grates soak while you prepare the dishwasher. This helps to loosen up stubborn grease and grime.
Step 5: Dishwasher Loading
Place the grates strategically in the dishwasher. Avoid stacking them or overloading them, allowing water and detergent to reach every nook and cranny.
Best drinking glasses for dishwasher (Best 7 suggestions)
Step 6: Choose the Right Cycle
Select a heavy-duty or pots and pans cycle on your dishwasher. These settings ensure a thorough cleaning, tackling the built-up grease effectively.
Step 7: Add Dishwasher-Safe Cleaner
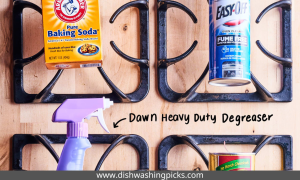
For an extra kick, add a dishwasher-safe cleaner to the detergent compartment. If you prefer a DIY approach, a mixture of baking soda and vinegar works wonders.
Step 8: Run the Dishwasher
Press start and let the dishwasher do its thing. Take a moment to appreciate the fact that you’re not on your hands and knees scrubbing away.
Step 9: Post-Cleaning Inspection
Once the cycle is complete, inspect your grates. If any stubborn spots persist, a gentle scrub with a brush or sponge should do the trick.
Step 10: Dry and Polish
Allow the grates to air dry or wipe them down with a clean cloth. Admire the gleaming results and pat yourself on the back for a job well done!
Step 11: Maintenance Tips
To keep your gas stove grates looking fresh, establish a regular cleaning routine. A quick soak and dishwasher cycle every couple of weeks will work wonders.
Your kitchen is now a sparkling testament to your cleaning prowess.
Choosing the Best Air Gap for Dishwasher
Gather Supplies
You should gather all the supplies first in order to learn how to clean gas stove grates in dishwasher:
Assemble Your Arsenal
Cleaning your gas stove grates in the dishwasher is about to become a breeze. Here’s what you’ll need:
- Dishwashing Detergent: Opt for a heavy-duty detergent or one specifically designed for cutting through grease. Make sure it’s safe for use in your dishwasher.
- Dishwasher-Safe Cleaner (Optional): For an extra boost, consider a dishwasher-safe cleaner. If you prefer a DIY solution, keep some baking soda and vinegar handy.
- Gloves: Shield your hands from any residual grime. A good pair of rubber gloves will do the trick.
- Dish Brush or Sponge: Keep a trusty dish brush or sponge nearby for any post-dishwasher touch-ups.
- Spatula or Blunt Knife: For the initial scrape-down, you’ll want a spatula or a blunt knife to remove any loose debris.
- Warm, Soapy Water: Before the dishwasher magic begins, have a basin of warm, soapy water ready for a pre-soak.
A Quick Note on Dishwasher Safety
Before you embark on your cleaning mission, ensure that your dishwasher is in good working condition. Check for any loose or damaged parts that might interfere with the cleaning process.
A Word About Dishwasher Placement

As you gather your supplies, keep in mind the strategic placement of your gas stove grates in the dishwasher. Avoid stacking them or crowding the space to allow for optimal cleaning efficiency.
Now that you’ve got your cleaning arsenal ready, let’s move on to the next step in our journey to sparkling clean gas stove grates.
Pre-Cleaning Preparation
Before we embark on the journey to pristine stove grates, safety first. Ensure your gas stove is turned off, and give it some time to cool down. Safety is our priority here, In addition to the following:
Gather Your Gear
Equip yourself with a pair of sturdy gloves. We’re in for some cleaning, and these gloves will shield your hands from the grime and grease.
Remove the Grates
Now, let’s get those grates out. Gently lift them from the stove. If you’ve been putting off this task for a while, you might notice a bit of a challenge. But don’t worry, a little elbow grease will go a long way.
A Quick Shake
Take the grates outside for a moment. Give them a gentle shake to rid them of any loose debris. It’s like sending your grates off for a quick fresh air break before the big cleanup.
A Spatula’s Touch
Armed with a spatula or a blunt knife, it’s time to scrape off the loose residue. Think of it as a warm-up for the dishwasher marathon. This step makes the dishwasher’s job a whole lot easier.
Soak Away
Fill your sink or a basin with warm, soapy water. Time for a soak. Drop those grates in and let them chill while we prep the dishwasher. This step works like a spa day for your grates, allowing the grease to loosen up.
And there you have it—our pre-cleaning rituals are complete. Now that our grates are prepped and ready, let’s march on to the next chapter of our cleaning adventure.
Post-Cleaning Steps
And there you have it—the post-cleaning steps to wrap up our gas stove grate cleaning adventure. Your kitchen now radiates a cleanliness that’s more than just visual—it’s a feeling of accomplishment and a fresh start:
Step 1: A Gleaming Result
As your dishwasher proudly announces the completion of its task, open the door to a world of gleaming gas stove grates. The journey is not over yet but pause for a moment to appreciate the fruits of your cleaning labor.
Step 2: Inspection Time
Now, grab a seat—metaphorically or literally—and inspect those grates. Admire how the once stubborn stains have surrendered to the power of your dishwasher. If, by chance, a few spots linger, worry not. We’ve got a plan for that.
Step 3: Gentle Scrubbing
For those persistent spots, pick up a gentle brush or sponge. A little post-dishwasher spa treatment will do wonders. Give the grates a once-over, ensuring every nook and cranny receives your personal touch.
Step 4: Air Dry or Towel Pat
Once satisfied with the sparkle, decide on the drying method. Letting the grates air dry is perfectly fine, or if you’re feeling proactive, grab a clean towel and give them a gentle pat-down. Picture this as the finishing touch to your cleaning masterpiece.
Step 5: A Final Polish
For the perfectionists among us, consider a final polish. A clean, dry cloth can add an extra shine to your newly rejuvenated grates. Stand back and admire—they’re practically begging to be used now.
Step 6: Reassembly
With your grates looking their best, it’s time for the reunion. Place them back on the gas stove, each grate finding its perfect spot. It’s a bit like putting the final pieces of a puzzle together, completing the kitchen aesthetic.
Step 7: Revel in Your Triumph
Step back, take a deep breath, and revel in the triumph of a job well done. Your gas stove grates are not just clean; they’re a testament to your dedication to a sparkling kitchen. So, pat yourself on the back—you’ve earned it.
Conclusion
Congratulations on conquering the art of cleaning gas stove grates in the dishwasher! You’ve transformed a once daunting task into a straightforward, efficient process that leaves your kitchen shining.
As we conclude our cleaning journey, take a moment to appreciate the gleaming results. Your gas stove grates are not just clean; they’re a reflection of your dedication to maintaining a pristine kitchen. The dishwasher has proven to be a reliable ally in this quest, saving you time and effort.
Remember, consistency is the key. Establishing a regular cleaning routine will keep your grates in top-notch condition, ensuring that they continue to sparkle with every use.

