Have you ever looked at a holiday decoration, a DIY project, or a cute ornament and thought, “I could make that myself”? Well, here’s a little secret: pipe cleaners are your new best friend. Those bendy, fuzzy wires from your craft drawer aren’t just for kindergarten projects — they can turn into adorable stars, perfect for decorations, gifts, or even a fun activity with the kids.
Imagine this: you’re sipping hot cocoa, twisting a shiny pipe cleaner into a star, and suddenly your living room feels cozy, crafty, and festive. Sounds pretty satisfying, right? And the best part — it’s quick, cheap, and totally customizable.
In this guide, we’re going to break down the process step by step. We’ll cover everything from picking the right pipe cleaners to shaping, twisting, and even adding little decorative touches so your stars sparkle and shine. Don’t worry if you’ve never crafted before — this is beginner-friendly, and I’ll walk you through it like a pro (without the judgment for a wonky point here and there).
Ready to turn simple pipe cleaners into magical stars? Let’s start with gathering your materials.
Materials You’ll Need
- Pipe cleaners: Silver, gold, or any color you like — glittery ones are perfect for that extra sparkle. You’ll need 1–2 per star depending on size.
- Scissors: Optional, only if you want to trim or cut multiple stars from a single pipe cleaner.
- Beads or sequins: Optional, for decorating the star once it’s shaped.
- Patience and a little creativity: Definitely required!
Pro tip: Pipe cleaners are super forgiving. Bend, twist, and reshape until your star looks just right — perfection isn’t the goal, fun is.
How to Make a Pipe Cleaner Star
Making a star with a pipe cleaner is easier than you think. Think of it like connecting the dots, except the dots are fuzzy, bendy, and way more fun. Let’s break it down step by step.
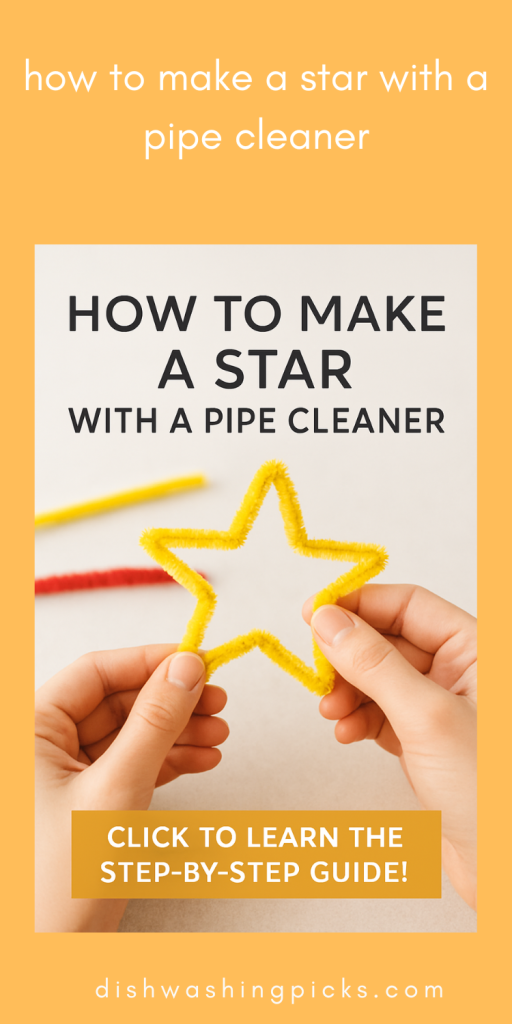
Step 1: Make the Star Shape
- Take your pipe cleaner and straighten it out a little.
- Bend it into a five-point star shape. Don’t stress if it’s not perfect — the charm is in the handmade look.
- Tip: Start by making the top point, then work your way around clockwise or counterclockwise until you complete the star.
Step 2: Secure the Ends
- Once your star shape is complete, twist the two ends of the pipe cleaner together to lock it in place.
- If you want it extra secure, you can add a tiny dab of glue or wrap the ends around another short piece of pipe cleaner.
Step 3: Adjust the Points
- Take a moment to tweak each star point. Pull them out or pinch them in to make them more defined.
- Remember: asymmetry is totally okay — it adds character!
Step 4: Optional Decorations
- Slide beads or sequins onto the points or along the edges for sparkle.
- You can also twist a second, glittery pipe cleaner around the star for a layered, 3D effect.
Step 5: Ready to Display
- Your star is ready! Use it as a hanging ornament, a gift topper, or even a cute desk decoration.
- You can bend a small loop at the top if you want to hang it with string or ribbon.
How to Make a Pipe Cleaner Star
Making a star with a pipe cleaner is easier than you think. Think of it like connecting the dots, except the dots are fuzzy, bendy, and way more fun. Let’s break it down step by step.
Step 1: Make the Star Shape
- Take your pipe cleaner and straighten it out a little.
- Bend it into a five-point star shape. Don’t stress if it’s not perfect — the charm is in the handmade look.
- Tip: Start by making the top point, then work your way around clockwise or counterclockwise until you complete the star.
Step 2: Secure the Ends
- Once your star shape is complete, twist the two ends of the pipe cleaner together to lock it in place.
- If you want it extra secure, you can add a tiny dab of glue or wrap the ends around another short piece of pipe cleaner.
Step 3: Adjust the Points
- Take a moment to tweak each star point. Pull them out or pinch them in to make them more defined.
- Remember: asymmetry is totally okay — it adds character!
Step 4: Optional Decorations
- Slide beads or sequins onto the points or along the edges for sparkle.
- You can also twist a second, glittery pipe cleaner around the star for a layered, 3D effect.
Step 5: Ready to Display
- Your star is ready! Use it as a hanging ornament, a gift topper, or even a cute desk decoration.
- You can bend a small loop at the top if you want to hang it with string or ribbon.
Display & Gifting Ideas for Pipe Cleaner Stars
So you’ve got your shiny, twisty stars — now what? Don’t let them sit in a drawer! Here are some fun ways to show them off or turn them into gifts:
1. Hanging Ornaments
- Twist a small loop at the top and hang your stars on your Christmas tree, a garland, or even from a window.
- Mix different colors and sizes to create a dazzling display.
2. Gift Toppers
- Add a star to wrapped presents for a personalized, crafty touch.
- Instant charm upgrade — no expensive bows needed!
3. DIY Mobile
- Make several stars in varying sizes and colors.
- Hang them from strings on a branch or a hoop for a fun room decoration or kid’s mobile.
4. Table Centerpieces
- Scatter small stars across a table or glue them onto sticks to make festive arrangements.
- Perfect for parties, holiday dinners, or just to brighten up your space.
5. Fridge or Wall Decor
- Attach small magnets to the back for fridge art.
- Or pin them on a corkboard to add sparkle and fun to any room.
6. Gift Packs
- Bundle several stars in a small box or bag.
- Makes a cute, handmade gift for friends, teachers, or family — bonus points for creativity!
Pipe Cleaner Star Cheat-Sheet & Final Tips
Here’s everything in one handy guide so you can start making stars without overthinking it:
Materials You’ll Need
- Pipe cleaners (any color, glittery ones for extra sparkle)
- Scissors (optional)
- Beads, sequins, or small decorations (optional)
- Patience + creativity
Steps to Make a Star
- Shape the Star – Bend the pipe cleaner into a five-point star.
- Secure the Ends – Twist the ends together or add a tiny dab of glue.
- Adjust Points – Pinch or pull points to sharpen the shape.
- Add Decorations – Slide on beads, sequins, or twist a glittery pipe cleaner around for flair.
- Display or Gift – Hang, place, or attach to gifts — the sky’s the limit!
Creative Variations
- Mix colors for multicolored stars
- Make a constellation with multiple stars
- Play with different sizes for dimension
- Combine with other pipe cleaner shapes (hearts, moons, letters)
Pro Tips
- Don’t stress about perfection — small imperfections give charm.
- Pipe cleaners are super forgiving; bend and twist until it looks right.
- Let kids or friends join in for a fun, interactive craft session.
Conclusion — Shine Bright with Your Pipe Cleaner Stars
And just like that, you’ve gone from a plain, bendy pipe cleaner to a sparkling, handmade star! 🌟 Whether it’s for holiday decorations, DIY gifts, or just a fun craft session, these stars prove that creativity doesn’t need to be complicated or expensive.
Remember, the magic is in the twist, bend, and personalization. Tiny imperfections? They make each star unique. Add beads, glitter, or combine colors — the possibilities are endless.
So next time you’re looking for a simple, cheerful craft, grab some pipe cleaners, channel your inner artist, and start twisting stars into life. Hang them, gift them, or just admire your handiwork — either way, you’ve created something truly special, and it’s all yours.
Fun fact: Crafting is proven to boost mood and reduce stress — so go ahead, make a constellation, and let your creativity shine!