Ever stood in the cleaning aisle, squinting at labels full of unpronounceable words, and thought, “Do I really need all this chemical jazz to clean my kitchen?” Yeah, me too. Honestly, it’s tempting to just grab a bottle and call it a day. But here’s the thing: making your own cleaning chemicals isn’t just about saving a few bucks—it’s about knowing exactly what’s going on your countertops, your bathroom tiles, and yes, even your hands.
Imagine this: you whip up a little concoction in your kitchen that can scrub, shine, and deodorize your home, all without giving you a headache or filling your nose with scary chemical fumes. Sounds like magic, right? Well, it’s mostly science… but don’t worry, the kind you can totally handle.
In this guide, we’re going to walk through easy, practical ways to make your own cleaning solutions, explain why each ingredient works (so you can impress friends with your science cred), and even toss in some humor because, hey, cleaning doesn’t have to be boring.
Ready? Let’s start with the basics.
The Superstars of DIY Cleaning
Before we start mixing stuff together like a chemistry wizard, it’s worth knowing which ingredients are your go-to heroes. Think of them as the Avengers of cleaning: simple, effective, and surprisingly versatile.
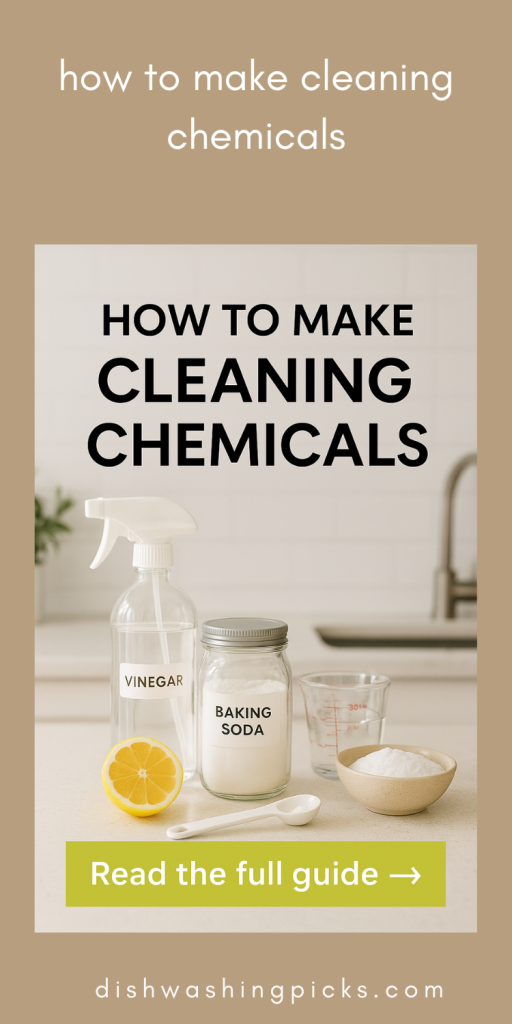
- Vinegar – The classic. It’s acidic, which makes it great for cutting grease, removing odors, and even tackling stubborn mineral deposits. Bonus: your pets probably won’t be traumatized by the smell… too much.
- Baking Soda – The gentle scrubber. Sprinkle it on a surface, add a little water, and you’ve got a paste that can tackle almost anything from stovetop gunk to smelly sneakers. Seriously, it’s like a sponge in powder form.
- Lemon Juice – Citrus power! Not only does it smell amazing, but the acid helps dissolve stains, kill bacteria, and leave surfaces sparkling. You might even catch yourself sniffing it for fun.
- Castile Soap – This is basically a superhero in liquid form. Gentle yet effective, it can clean dishes, floors, and even your hands. Plus, it’s plant-based, so Mother Nature gives you a thumbs-up.
- Essential Oils (Optional but Fancy) – Lavender, tea tree, or eucalyptus can add a pleasant scent and even extra antibacterial oomph. Think of it as the cherry on top of your DIY cleaning sundae.
Now, I know what you’re thinking: “Okay, that’s cool, but how do I actually mix these without blowing anything up?” Don’t worry—we’re keeping it safe and simple. You won’t need a lab coat… or a fire extinguisher.
DIY Cleaning Recipes You Can Actually Use
Okay, so now that we know our cleaning Avengers, let’s see them in action. The best part? Most of these recipes are so simple you’ll wonder why you ever bought that overpriced spray bottle.
1. All-Purpose Surface Cleaner
Think of this as your everyday cleaning sidekick. Perfect for counters, tables, and even shelves.
Ingredients:
- 1 cup water
- 1 cup white vinegar
- 10–15 drops of essential oil (optional, but makes it smell amazing)
How to use:
- Pour everything into a spray bottle.
- Shake it up like a mini cleaning cocktail.
- Spray on the surface and wipe with a cloth.
Pro tip: If you’re worried about the vinegar smell, stick to lemon or lavender essential oil. It smells like a spa instead of a science experiment.
2. Baking Soda Scrub
Got tough stains or baked-on gunk? This one’s your go-to.
Ingredients:
- ½ cup baking soda
- A few tablespoons of water (enough to make a paste)
How to use:
- Mix water into the baking soda until it forms a paste.
- Apply to the stained area or grimy surface.
- Let it sit for 5–10 minutes, then scrub and rinse.
Imagine this: That stubborn pan stain that’s been mocking you for weeks? Yeah, it won’t be laughing anymore.
3. Glass & Mirror Cleaner
Say goodbye to streaks and fingerprints.
Ingredients:
- 1 cup water
- 1 cup rubbing alcohol
- 1 tablespoon white vinegar
How to use:
- Combine everything in a spray bottle.
- Spray on mirrors or windows.
- Wipe with a lint-free cloth or paper towel for streak-free shine.
Fun fact: The alcohol helps it evaporate quickly, so no annoying smears.
4. Fresh-Smelling Floor Cleaner
Because even your floors deserve to smell good.
Ingredients:
- 1 gallon warm water
- ½ cup white vinegar
- 10–15 drops of essential oil (like lemon or tea tree)
How to use:
- Mix everything in a bucket.
- Mop your floors as usual.
- Enjoy the fresh, clean smell (and maybe brag a little to guests).
Pro Tips and Hacks for DIY Cleaning
So, you’ve got your ingredients and a few recipes under your belt—awesome. But let’s face it, even the best cleaning solution is only as good as how you use it. Here are some tricks to make your DIY cleaning life way smoother:
1. Store Smart
Ever made a batch of cleaner and then forgotten where you put it? Yeah, me too.
- Tip: Use clear, labeled spray bottles or jars. Bonus points for cute labels—you’ll feel fancy every time you clean.
- Hack: Keep a small spray bottle of all-purpose cleaner in high-traffic areas like the kitchen or bathroom. Less hassle, more spontaneous cleaning bursts!
2. Mix Only What You Need
Homemade cleaners are awesome, but they don’t last forever.
- Tip: Make small batches. Vinegar and baking soda solutions work best fresh. This also prevents the awkward “forgotten science experiment” smell in the back of your cupboard.
3. Use Multi-Taskers
Why have five different sprays when one will do?
- Idea: Your vinegar-based all-purpose cleaner works on counters, windows, and even cabinet doors. Imagine carrying just one bottle around the house instead of juggling three.
4. Pre-Treat for Stubborn Messes
Got a pan with baked-on cheese or a shower full of soap scum? Don’t just attack it head-on—give it a head start.
- Hack: Sprinkle baking soda or spray vinegar and let it sit 10–15 minutes. It softens the grime, making scrubbing a breeze. Less elbow grease, more wow factor.
5. Keep It Fun
Yes, cleaning can be… fun.
- Tip: Put on your favorite playlist, podcast, or audiobook. Time flies when you’re jamming and spraying.
- Idea: Challenge yourself: “Can I clean this counter in under 2 minutes?” You’ll be amazed at how motivated you get.
Conclusion: Time to Become a DIY Cleaning Pro
So, here we are—by now, you’ve met the superstar ingredients, mastered a few easy recipes, and picked up clever hacks to make cleaning less of a chore and more of a mini-adventure. Feels good, right?
Here’s the beauty of making your own cleaning chemicals: you’re in control. No mystery ingredients, no overpowering smells, no guilt about wasting money on products you barely use. Just simple, safe, and surprisingly effective solutions that you made yourself.
Think of it like this: every time you mix a little vinegar, sprinkle some baking soda, or add a drop of essential oil, you’re not just cleaning—you’re winning at adulting. And yes, it’s totally okay to feel proud about it.
Bonus Tips for Extra Sparkle
- Double Duty: Keep a small spray of your all-purpose cleaner in your car or office. Surfaces deserve love everywhere!
- Go Natural: Skip harsh chemicals entirely for kids’ toys, pet areas, and food prep surfaces. Your home stays safe and fresh.
- Experiment Safely: Mix things cautiously—stick to recipes or minor variations. A little creativity can go a long way, but safety first.
And the best part? Once you get the hang of it, DIY cleaning becomes second nature. Imagine the satisfaction of walking into a sparkling home, knowing you made it shine. Not to mention the bragging rights when friends ask what magical elixir you’re using.
So grab your bottles, roll up your sleeves, and start experimenting. You might even find yourself secretly enjoying cleaning… dare I say it, maybe even looking forward to it a little.